Does the sight of water stains spreading across your ceiling near the chimney fill you with dread? A leaky roof around the chimney can be a persistent and frustrating problem, but addressing it promptly can prevent further damage and costly repairs. In this comprehensive guide, we will delve into the causes of chimney leaks and provide you with step-by-step instructions to fix them effectively.
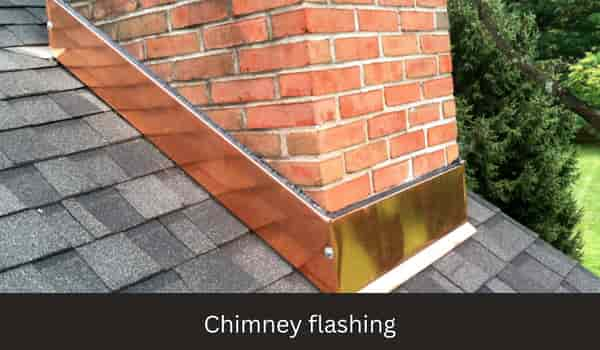
Image: 9to5civil.com
Understanding the Causes of Chimney Leaks
To effectively fix a roof leak around a chimney, it’s crucial to pinpoint the cause. Common culprits include:
-
Damaged flashing: Flashing is a thin material installed around the base of the chimney to prevent water from seeping through the joints. Over time, flashing can deteriorate or become damaged, compromising its ability to keep water out.
-
Cracked mortar: Mortar is used to seal the gaps between bricks or stones in the chimney. Cracks in the mortar can allow water to penetrate and seep into the roof structure.
-
Missing or damaged shingles: Shingles provide a protective layer over the roof. Missing or damaged shingles around the chimney can leave gaps for water to enter.
-
Debris accumulation: Leaves, twigs, and other debris can accumulate around the chimney base, blocking water drainage and causing leaks.
Step-by-Step Guide to Fixing a Roof Leak Around a Chimney
With a clear understanding of the possible causes, let’s now delve into the step-by-step process for fixing a roof leak around a chimney:
Step 1: Safety First
Before beginning any work on your roof, ensure your safety by wearing proper clothing and equipment, including gloves, safety glasses, and a sturdy ladder. If you are uncomfortable working on the roof, don’t hesitate to contact a professional roofer.

Image: www.pinterest.com
Step 2: Identify the Source of the Leak
Carefully inspect the chimney and the surrounding roof area for any visible damage or signs of leakage. Check the flashing for tears or gaps, examine the mortar for cracks, and look for missing or damaged shingles.
Step 3: Address Damaged Flashing
If the flashing is damaged, you may need to replace it. Remove the old flashing carefully using a pry bar and replace it with new flashing that extends at least 6 inches up the chimney. Seal the edges with roofing cement for a watertight finish.
Step 4: Repair Cracked Mortar
To repair cracked mortar, use a trowel to remove any loose or damaged mortar. Clean the area with a wire brush and apply fresh mortar. Smooth the surface and let it dry completely before applying a waterproof sealant.
Step 5: Replace Missing or Damaged Shingles
If there are missing or damaged shingles around the chimney, replace them promptly. Remove the old shingles using a pry bar and slide the new shingles into place. Secure them with roofing nails and seal the edges with adhesive roofing cement.
Step 6: Clear Debris
Regularly clear away any debris that accumulates around the chimney base. Remove leaves, twigs, and other materials that can block water drainage and contribute to leaks.
Expert Insights and Actionable Tips
To enhance your understanding and ensure a successful repair, consider the following expert insights:
-
“When replacing flashing, use a type that is compatible with your roof material and is designed to withstand the elements in your area,” advises Robert A. Jackson, a licensed roofer with over 20 years of experience.
-
“To extend the lifespan of your chimney and prevent future leaks, have it inspected annually by a qualified roofer,” recommends Amanda Stevens, an expert in home maintenance and repairs.
-
“If the leak is severe or you are unsure of the cause, do not hesitate to contact a reputable roofing contractor,” says David L. Jones, a certified roofing consultant with a track record of successful chimney ремонта.
How To Fix Roof Leak Around Chimney
Conclusion
Fixing a roof leak around a chimney can empower you to maintain the integrity of your home and prevent costly damage. By following the step-by-step instructions outlined in this guide, addressing chimney leaks can be a manageable task for those willing to tackle it themselves.
For a more comprehensive and secure solution, consider seeking professional assistance from a licensed roofer. Remember, a well-maintained chimney not only protects your roof from leaks but also ensures the safety and comfort of your entire home.
