Get interesting information about How To Change Drive Belt On Troy Bilt Riding Mower, this article is specially curated for you from various reliable sources.
How to Change the Drive Belt on a Troy-Bilt Riding Mower
Maintaining your Troy-Bilt riding mower is crucial for its optimal performance and longevity. Replacing the drive belt, which transmits power from the engine to the transmission, is a task that any avid DIYer can accomplish with the right tools and a little bit of know-how. In this comprehensive guide, we’ll walk you through every step involved in changing the drive belt on your Troy-Bilt riding mower.
Safety Precautions
Before starting any maintenance work, ensure proper safety measures are in place. Disconnect the spark plug wire and allow the engine to cool completely. Wear appropriate safety gear, including gloves and eye protection, to minimize potential risks.
Tools and Materials
- Replacement drive belt (check your mower’s manual for specific part number)
- Socket wrench set
- Adjustable wrench
- Screwdriver
- Pliers
Step-by-Step Instructions
1. Locate and Inspect the Drive Belt
Engage the parking brake and lift the mower deck. Identify the drive belt, which is typically located beneath the deck and connects the engine crankshaft to the transmission. Inspect the belt for signs of wear, cracks, or glazing, indicating the need for replacement.
2. Disconnect the Battery
Locate the battery and disconnect the negative terminal using a socket wrench. This step is crucial to prevent any electrical hazards during the belt replacement process.
3. Remove the Belt Guards
Using the socket wrench, remove the bolts securing the belt guards. The location of the belt guards may vary depending on the mower model.
4. Loosen the Tensioner
Locate the tensioner arm, a spring-loaded mechanism that keeps the belt tight. Insert a screwdriver or adjustable wrench into the tensioner and carefully pry it to release tension.
5. Remove the Old Belt
With the tension released, slide the old drive belt off the pulleys. Note the routing of the belt to ensure proper installation of the new one.
6. Install the New Belt
Align the new drive belt with the pulleys, taking care to follow the original routing. Slide the belt onto the pulleys and ensure it is seated correctly.
7. Adjust the Tensioner
Re-adjust the tensioner arm to create proper tension on the drive belt. The specific tension adjustment varies depending on the mower model. Refer to your mower’s manual for detailed instructions.
8. Reinstall the Belt Guards
Once the tension is set, reinstall the belt guards using the bolts removed earlier. Ensure they are securely fastened to prevent the belt from coming off.
9. Reconnect the Battery
Return to the battery and reconnect the negative terminal using the socket wrench. Double-check all electrical connections to ensure they are secure.
10. Test the Mower
Engage the parking brake and lower the mower deck. Start the mower and allow it to idle. Shift the mower into gear and test the drive system to ensure the new belt is functioning correctly.
Tips and Expert Advice
- Replace the drive belt regularly according to the manufacturer’s recommendations to maintain optimal mower performance.
- If you notice any unusual noises or vibrations while operating the mower, inspect the drive belt for wear and replace it if necessary.
- Keep the underside of the mower deck clean to prevent debris from accumulating and damaging the drive belt.
- If you are not comfortable changing the drive belt yourself, consult a qualified mechanic for professional assistance.
Frequently Asked Questions (FAQs)
Q: How often should I replace the drive belt on my Troy-Bilt riding mower?
A: Refer to your mower’s manual for specific belt replacement intervals. Typically, it’s recommended to replace the belt every 100-150 hours of operation or annually, whichever comes first.
Q: Can I use any drive belt for my Troy-Bilt riding mower?
A: No, it is crucial to use a replacement belt specifically designed for your mower model. Consult your mower’s manual or contact a Troy-Bilt dealer to obtain the correct part number.
Q: What are the signs that indicate my drive belt needs replacing?
A: Common signs of a worn or damaged drive belt include reduced mower performance, difficulty shifting gears, or unusual noises or vibrations during operation.
Conclusion
Changing the drive belt on your Troy-Bilt riding mower is a straightforward task that can be completed in under an hour. By following the steps outlined in this guide, you can ensure proper maintenance of your mower and enjoy optimal performance. If you encounter any difficulties or have additional questions, consult the mower’s manual or seek professional assistance.
Do you have any further questions or experiences you’d like to share about changing the drive belt on a Troy-Bilt riding mower? Feel free to leave a comment below!
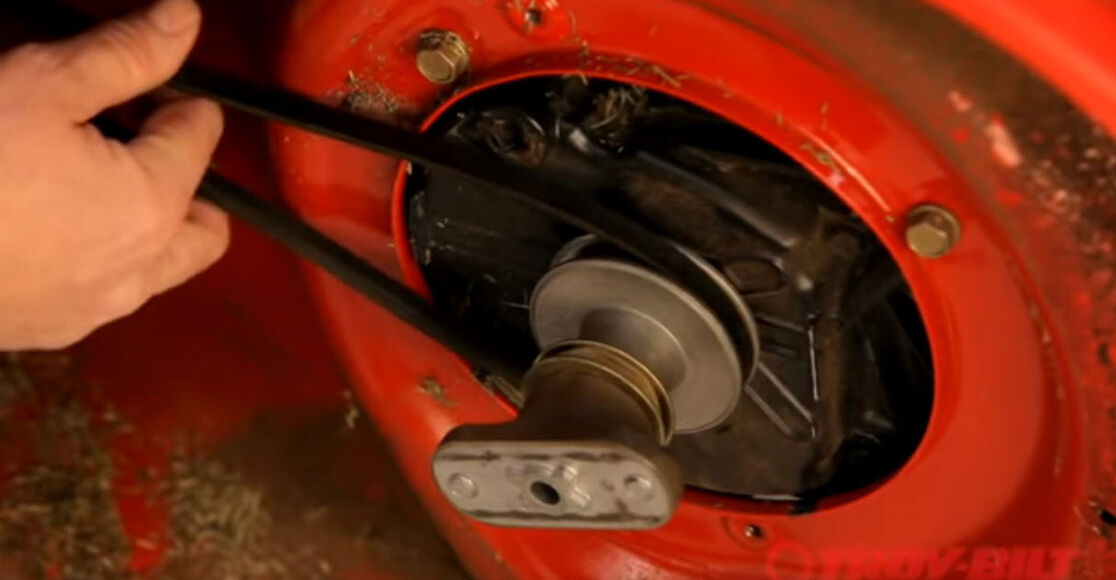
Image: www.troybilt.com
Thank you for visiting our website and taking the time to read How To Change Drive Belt On Troy Bilt Riding Mower. We hope you find benefits from this article.
