Introduction:
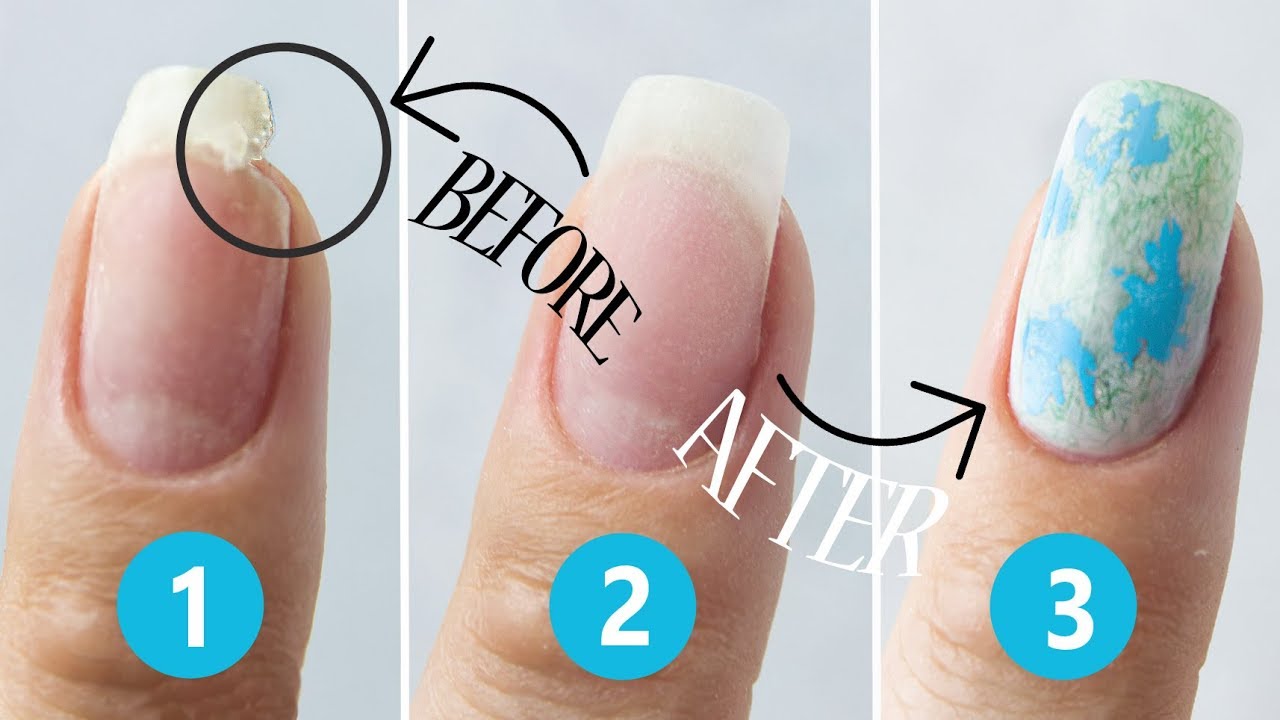
Image: www.youtube.com
Mishaps happen, and a broken nail can be a frustrating inconvenience. Gel polish, with its chip-resistant and long-lasting formula, takes the sting out of such occurrences. This article will serve as your detailed guide to effortlessly repair a broken nail with gel polish, restoring its strength and polished look.
Gel polish, unlike regular nail polish, requires UV light to cure and bond to your nails. This durability makes it an ideal choice for mending broken nails, especially if the break extends to the free edge. With a few simple steps and the right tools, you can mend your broken nail and maintain a flawless manicure.
Materials You’ll Need:
- Gel polish in your desired color
- UV/LED lamp
- Nail file
- Buffer
- Nail clipper (optional)
- Nail glue (optional)
Step-by-Step Guide:
1. Assess the Damage:
Determine the severity of the break. Minor breaks near the cuticle can be easily fixed. However, more significant breaks near the free edge may require additional support.
2. Clean and Prepare:
Gently remove any chipped or loose gel polish around the break. Buff the surface lightly to create a smooth and even base for the repair.
3. File and Shape:
Use a nail file to smooth out any jagged edges around the break. If necessary, you can gently reshape the nail to maintain its evenness.
4. Apply Nail Glue (Optional):
If the break is significant, consider using nail glue for added reinforcement. Apply a small drop of glue to the broken area and use a toothpick or a nail art brush to spread it evenly. Allow the glue to dry according to the manufacturer’s instructions.
5. Rebuild with Gel Polish:
Apply a thin layer of gel polish over the broken area, gently working the brush to fill in any gaps. Cure the polish under the UV/LED lamp for the recommended time (typically 30-60 seconds). Repeat this step until the break is filled and the nail surface is smooth.
6. File and Buff:
Once the gel polish is cured, use a fine-grit file to shape the repaired area and blend it seamlessly with the rest of the nail. Buff lightly to remove any rough edges or imperfections.
7. Apply Top Coat and Cure:
Apply a layer of gel top coat to seal in the repair and add a glossy finish. Cure the top coat under the UV/LED lamp.
Tips from the Pros:
-
Use a compatible gel top coat and base coat to ensure proper adhesion.
-
Don’t over-file the nail as it can weaken it further.
-
If the break is particularly severe, consider seeking professional nail repair services.
-
Regularly moisturize your nails and cuticles to prevent future breakage.
Conclusion:
Mending a broken nail with gel polish is a simple and effective way to restore its strength and appearance. By following these steps, you can confidently address nail mishaps, maintain the integrity of your manicure, and keep your nails looking their best. Remember, practice makes perfect, and with a little patience and care, you’ll master the art of gel polish nail repairs in no time.

Image: www.pinterest.com
How To Fix A Broken Nail With Gel Polish On
